This post contains affiliate links
Easy Tutorial On How To Tell Right Side Of Crochet Fabric
We have all been there when we started, right? How to tell the right side of crochet?
Turning your project a thousand times trying to determine which side of it is the right side and which is the wrong side.
Let me take the guesswork away! I am going to give you a few tips and handy tricks on how to tell right side on your crochet project.
Have you ever come across a crochet pattern only to scratch your head and think what does RS and WS abbreviations mean?
RS stands for right side. This is the side that is intended to face outwards on the project. This is often the neat side that will be on the outside of your project so you want it to look as neat as possible!
WS stands for wrong side. This is the side of your project that will not be visible on projects like bags or sweaters. This is the side where you can hide colour changes or knots.
However, some crochet stitches actually produce a reversible fabric which looks identical on the front and back.

In this case it is up to you to determine which side of your project is the right side and which is the wrong side. One thing you need to remember however, is to stick with it throughout the project.
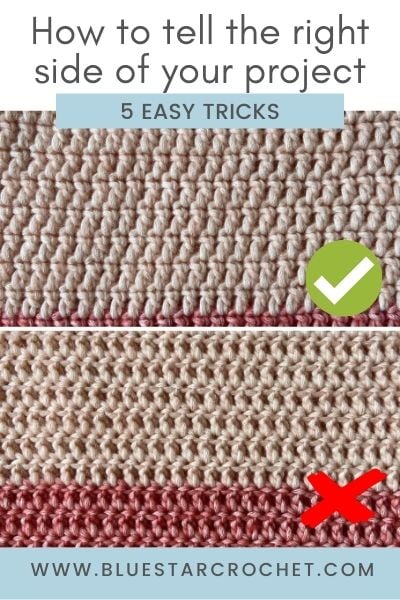
Make sure that the right side of your crochet is the neat side that hasn’t got any jolty colour changes, bumps or yarn knots.
How To Tell The Right Side Of Crochet Project
Here are 5 easy tricks on how to tell the right side of crochet fabric or your project.
1. The position of the chain tail
There is an easy trick to determine which side of your work is the right or wrong side using the tail end of your foundation chain. Lay your crochet project flat in front of you.
If you crochet with your right hand and look at your work and the yarn tail is at the bottom left – that means you are looking at the right side of your work.
When the tail is on the bottom right, you are looking at the wrong side of your work.

If you crochet with your left hand, this will be the opposite. If the yarn tail is on the bottom left, you are looking at the wrong side of your work.
When the tail is on the bottom right then, you are looking at the right side of your work.

2. The row count
The first row of your project is the right side. This does not include the foundation chain. So the first row of your single or double crochet stitches is the right side.
Unless the pattern designer specifies otherwise, the right side of the fabric will always be a row with odd number.
To make it easier you can simply place a stitch marker on the right side of your work to mark it.
3. Working in round
It is much easier to determine the right side of your crochet project when you are working in round.
If you are working on projects like amigurumi or crochet granny squares and you are not instructed to turn your work, the right side is always facing you.

Secondly, unless specified otherwise in your pattern, the side facing you is always the right side. These stitches will look more uniform and less bumpy.

4. The Best-Looking Side Is the Right Side
This is a safety net that will save many crocheters.
If you do not need to determine the right side of your crochet project for the pattern to work or any other technical reasons, my advice is to pick the best looking side!
5. Stitch Dependant
As the name suggests, sometimes the right side of your crochet work will be automatically determined by the stitches you use.
This mainly applies for stitches that consist of two row repeats. You can see a couple of examples on the photos below.
In picture A, you can see that the rows in mustard colour are a mixture of wrong side and right side. However, the cluster V stitch in green yarn automatically decides the right side.
Because the cluster V stitch is worked in different colour and stands out, I have picked the right side of this particular stitch to be the right side of the whole project.

The second example is a combination of rows of 4 dc cluster stitches and a row of single crochet stitches.
In this case, I have picked the right side of the 4 dc cluster stitch as this is the more prominent stitch in this pattern.

Why is it important to tell the right side of your crochet project?
The most important reason to be able to tell the right side of your crochet is for aesthetic reasons. We all want our projects to look their best when we wear or display them proudly.
Some crocheters simply choose the side they like the best and consider it the right side. Just remember to always stick to the same side you have picked throughout the project.
Sometimes pattern instructions will tell you to perform stitches or techniques on the right or wrong side or instruct you to “end on the wrong side.” That is when you will need to know which side is which.
You’ll also notice that the right and wrong sides of your work have different textures. This is especially important for crocheting things like amigurumi or garments worked top down in round.

Other items like blankets or dishcloths are more forgiving and become reversible.
The pattern designer will sometimes specify which side is the right side and which is the wrong side.
It means they are telling you that a specific pattern will emerge on one side of the fabric. This might be the case with certain colour work techniques or techniques like mosaic crochet.
Final Thoughts
I hope you enjoyed how to tell right side of crochet tutorial. I have more free crochet patterns and tutorials that you might enjoy right here on the blog.
If you enjoyed this tutorial, you might also like these:
- How To Crochet Straight Seam When Working In Rounds
- How To Extend Crochet Foundation Chain – Free Tutorial
- 7 Useful Things you need to know about Tunisian Crochet
- How to crochet oval shape perfectly every time
- The Easiest Way To Join New Yarn In Crochet Securely
Secondly, if you think you crochet crew would like it too, share the pattern link with them! You can also shout from the rooftops, however it would be more effective if you share this pattern on your social media…
Apparently, that’s what today’s kids do, it’s the “cool” thing!
I also send out a fun and free newsletter that is packed with crochet goodies! It is full of free crochet patterns, hand picked round ups and stitch tutorials.
You will also become one of my VIPs and receive exclusive discount codes on newly released patterns that I do not share anywhere else!
So, my crochet newsletter is THE place to be! Sign up below today for a free PDF delivered straight to your inbox right after you sign up!
How To Tell Right Side Of Crochet – 5 Easy Tricks


Lots of designers arrange so an edging will end up with the wrong side facing up on the right side of the main crochet. Or they have the edging finishing on the right side, and the main body of crochet facing you on the wrong side. Either way, i find that somewhat irritating! Sometimes you can solve it and sometimes you can’t. If I can’t, then I tend to have the edging finishing with the wrong side facing, it seems less bad aesthetically to do that.