This post contains affiliate links
Free Crochet Bath Mitt Pattern
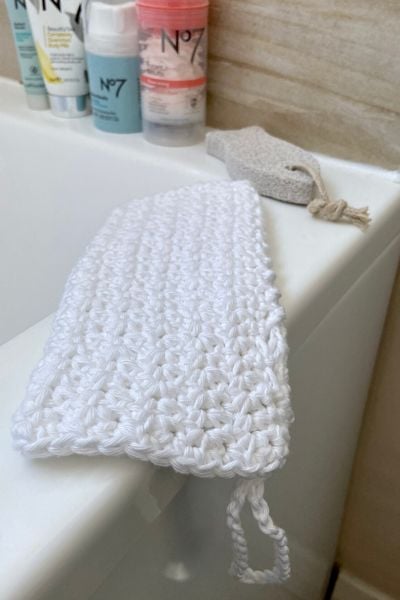
This is a free crochet bath mitt pattern for a practical addition to your bathroom. Use it for a relaxing bath or shower.
There is something so special about having those precious few minutes to take a relaxing bath or a shower.
Whether you are a busy mum or have a busy and demanding career, we all need time to relax.
I love taking a nice relaxing shower after a busy day. However, what I found lately is that all the bath loofas just fall apart after a few uses.
Not only is that annoying an impractical when you are in the middle of a shower. It is also very demanding and damaging to the environment.
That is the main reason why I have designed crochet bath mitt. This is a great addition to your shower routine.
I find washcloths a little tricky to to use. However, with this bath mitt you simply place it on your hand like a glove, soap it up and you’re good to go.
There is no dropping it in the shower or a bath as it is safely secured on your hand.

Crochet Bath Mitt Design Details
For this cute and practical crochet bath mitt I have used 100% cotton yarn. This is the best yarn you can use for any bathroom accessories.
Cotton yarn is absorbent, hard wearing and can be washed at very high temperatures in the washing machine.
This is important when cleaning things like washcloths or bath mitts. You do not want bacteria forming and having a party on something you use to clean your body.
Secondly, I have used single crochet V stitch. This is a simple to make stitch that provides gaps in the fabric as well as subtle texture.
The chain space gaps make this crochet bath mitt slightly more open which allows it to dry quicker as opposed to a dense fabric.
On the other hand, this stitch also provides a little texture. It is great for a light massage or exfoliating your body.
It is the perfect combination of both worlds.

How do you crochet a bath mitt?
It is really simple to crochet a bath mitt, all you need to crochet is a rectangle shape.
You can either crochet a narrow long rectangle like I have done in this case. Then fold it in half and sew the sides. In this case the fold will sit on top of your fingernails.
When sewing up the sides you leave a little opening on one side where your thumb is.
Alternatively, you can crochet wide and shorter rectangle which will fold in half with the fold sitting on the side of your palm.
You then sew up the top across your fingernails and down the side. Again, do not forget to leave a little opening for your thumb.
Thirdly, you can also crochet a bath mitt like a classic glove where you work in joined rounds instead of rows.
You can start from the top of your fingers and work down or work from wrist up. You simply create the thumb opening in the process of working the rounds.
Which ever way you choose to crochet your bath mitt, make sure you use 100% cotton yarn and a stitch that is not too dense.
Get the ad free PDF version of this pattern from my shops below


MATERIALS
- Hobbii Rainbow Cotton (DK weight; 100% cotton; 75 m per 50g) x 1 ball in White
- 4 mm crochet hook
- Yarn needle
- Scissors
FINISHED SIZE
to fit an adult woman hand
21 cm circumference x 18 cm length
TENSION
5 sc V sts x 15 rows = 10 x 10 cm / 4 x 4 inch measured across sc V st
STITCHES AND ABBREVIATIONS (US CROCHET TERMS)
ch = chain
sc = single crochet
sc V st = single crochet V st – (1 sc, 2 ch, 1 sc) worked in same st/sp
ch-sp = chain space
sp(s) = space(s)
st(s) = stitch(es)
PATTERN NOTES
- the bath mitt is worked as a long narrow rectangle
- it is folded in half with the fold sitting on top of fingers
- the sides are then sewn together with a thumbhole created on one side
- I added a small loop on one side so you can hang it up in the shower to dry
- to adjust the length, simple add/take away a desired number of rows
- to adjust the width, add or take away number of stitches, chain a multiple of 3 + 3

Crochet Bath Mitt Main Pattern
Chain 18.
Row 1: starting in 2nd ch from hook, 1 sc, miss next ch, * 1 sc V st in next, miss next 2 ch sts; repeat from * across until last 3 ch sts, 1 sc V st in next, miss 1 ch, 1 sc in last ch, turn. [5 sc V sts + 2 sc]
Row 2: 1 ch (doesn’t count as a st throughout), 1 sc in same st at the bottom of 1 ch, miss next sc, * 1 sc V st in next 2 ch-sp, miss next 2 sc; repeat from * across until last sc, 1 sc in last st, turn. [5 sc V sts + 2 sc]
Repeat Row 2 another 52 times or until you reach desired length for your hand.

Finishing Instructions
Fold in half across the shorter edge. Sew up one side completely.
On the other side, start sewing from the wrist end towards the fingers. Sew up 3.5 cm, leave a gap big enough for yourthumb, sew up the rest of the mitt all the way up to the fingers.
Reattach yarn in the first st around the bottom opening of the mitt.
Work 1 sc in each sc and 1 sc into each 2 ch-sp around, chain 25, sl st to first sc.
Fasten off. Sew in all ends securely.

Final thoughts…
I hope you have found these crochet owl patterns helpful. If you think your crafty friends would find this tutorial helpful, why not share it with them?
You can share a direct link to this tutorial on your social media.
If you enjoyed this pattern why not also check out these:
- Quick and Easy Crochet Washcloth – Free Pattern
- 10 Easy Crochet Washcloth Patterns For Beginners
- The Fiercely Fun and Free Crochet Face Scrubbies Pattern
Do not forget to pin this tutorial to your favourite Pinterest Board so you can easily find it later too.
I also send out a fun and free newsletter that is packed with crochet goodies! It is full of free crochet patterns, hand picked round ups and stitch tutorials.
You will also become one of my VIPs and receive exclusive discount codes on newly released patterns that I do not share anywhere else!
So, my crochet newsletter is THE place to be! Sign up below today for a free PDF delivered straight to your inbox right after you sign up!


Thank you for this stylish bath mitt. My friend needs a loofa type mitt, only softer. I’m using 7/2 natural linen and an E-4 aluminum hook. I thought about using cotton but that just starts too soft and gets limp. I’m hoping this will be exactly what she needs. The nice thing about linen is that it gets softer each time it is washed, up to a point. So, Score! Again, thank you.
You’re welcome!