This post contains affiliate links
Free Interlocking Crochet Tutorial – Simple And Basic
Interlocking Crochet is a simple colorwork technique creating a stunning design on both sides. This reversible fabric can be used for so many projects.
Interlocking crochet looks intricate and complex, however, it is easier than it looks. You can use interlocking crochet to create many beautiful projects.
Items like blankets, hats, scarves, washcloths or other projects are all great makes to use this technique for.
You will need some basic crocheting knowledge to do interlocking crochet. Practice the pattern and then start creating beautiful interlocking crochet designs.
What Is Interlocking Crochet?
Interlocking Crochet is a technique that creates two-sided fabric using at least two colors. It interlocks or “weaves together” two crochet mesh fabrics.
This is one of the reasons this technique is sometimes referred to as double filet crochet.
The meshes weave in and out of each other through the windows of the other color mesh, but the mesh is never trapped inside a stitch.
Depending on the stitch used, you can create the same pattern on the front and back or two completely separate designs on the front and back.
This is done by working to the front of the chain spaces or behind them. Also by working around the post of the stitches moving the mesh to the front or back. This way you are fixing the two crochet mesh fabric together.
It lends itself to many different geometric designs. However, they require planning ahead as a different pattern will form on each the front and back sides of your work.
It is also a slow-growing project. Essentially, you are crocheting two projects at the same time so it is one to be patient with!
PIN THIS ARTICLE FOR LATER

Advantages of Interlocking Crochet
There are many advantages of interlocking crochet:
- it is double-sided – as opposed to other crochet colorwork techniques, the planned design will appear on the reverse side making your project reversible
- you only work with one color at a time – no tangles or messy colorwork with strands crossing over or having to hide them by working over them, or visible floats on the back
- easier stitch placement – because you only work with color A into stitches in color A, it is easier to know where to place your stitches
- uses beginner stitches – interlocking crochet only uses basic stitches like chain st, double crochet (US terms) and double crochet worked around the post of stitches
How do you do an interlock in crochet?
Firstly, you need to choose a suitable yarn. I would recommend choosing a yarn that does not split and is easy to work with.
Secondly, to make the interlocking crochet colorwork stand out, I suggest choosing colors with strong contrast. This way your pattern will stand out beautifully.
Interlocking crochet normally starts with creating the first row of each crochet mesh separately. You then connect them together by working over the chain spaces and post stitches.
However, this technique can be both a little confusing and tricky to get right. The two mesh fabrics move around a lot and it is so easy to miss stitches and be off count.
I have found a much easier way to start and set up an interlocking crochet row. Check out the video tutorial below.

Interlocking Crochet Technique Video Tutorial
Take a look at the interlocking technique I simplified and used in my designs. This is a beginner-friendly pattern repeat as it keeps the design in straight lines.
Once you get comfortable with this technique, you can experiment with more intricate designs.
CLICK HERE FOR A VIDEO TUTORIAL on my YouTube Channel.
Is interlocking crochet the same as Mosaic crochet?
This is a question that is often asked. The simple answer is no.
Although both techniques have things in common, there are major differences between them to make them both stand-alone and recognized techniques.
| Interlocking Crochet | Mosaic Crochet |
|---|---|
| the wrong side has an inverse design of the front | the wrong side has just stripes |
| creates a reversible fabric with pattern on both sides | no pattern on reverse |
| worked on both the right and wrong sides with turning | worked in rows on the right side only |
| works with one yarn color at a time | works with one yarn color at a time |
| no need to fasten off after each row | fasten off after each row having to re-join yarn on the right side |
| no ends to hide within border, can add any border you like | needs a thick double border to hide all the ends on the edges |
| gaps are created between stitches as they are not fixed | each stitch is fixed and held in position |
| creates double layered fabric | finished fabric is thinner than interlocking crochet |
You can see visual differences explained in THIS VIDEO.
Project Ideas
Here are a few of my designs that use the very basic interlocking crochet technique. The simple stripes created this way are fun and the finished projects are super squishy!
Anton Beanie
This crochet beanie is also a super warm winter accessory. Because of the interlocking technique I used, the beanie is actually double thick!
It has an added layer of yarn stitches on the inside which makes it super warm. Crochet Beanie Easy Pattern – Anton Beanie is free on my blog.

Pinstripe Cushion
I wanted to create a colorful cushion cover with the stripes running vertically rather than horizontally. However, I knew I did not want to be changing colors every stitch to achieve this effect.
Although you do need to change colors quite often, it is only every row. Interlocking Crochet Cushion Cover is free on my blog.

Explorer’s Mittens
I have used two different colors for these men’s crochet mittens. This makes it a great pattern where you can combine the recipient’s favorite colors.
If they are football fans, you can also use their favorite club’s colors. Men’s Mittens Crochet Pattern – Free Explorer Mittens is free right here on the blog.

I have also found more intricate designs that use interlocking crochet. These are a little more advanced.
However, once you have practiced the basics and know how the technique works, why not give them a go!
Both of these patterns come with full tutorials so you can explore new patterns even if you have just started with this technique.
Interlocking Crochet Baby Blanket
This is a beautiful baby blanket accompanied by a thorough video tutorial, check out the pattern HERE.

Interlocking Tiles Crochet Blanket
Check out this stunning crochet blanket pattern consisting of 12 squares HERE.

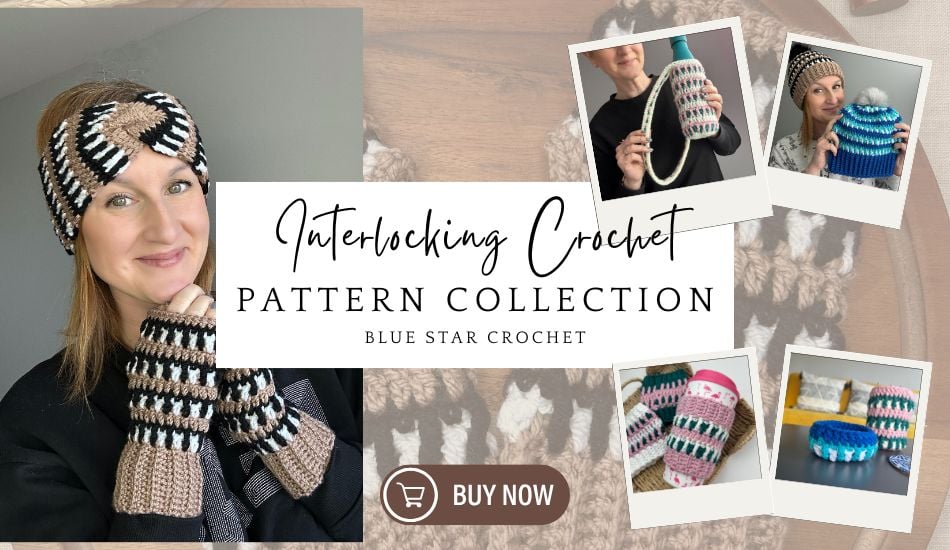
Interlocking Crochet Pattern Bundle
Repetition builds confidence faster than complexity.
Same stitch.
Six different projects.
Confidence compounds with every finish.
If you’ve ever looked at a textured crochet stitch and thought“That looks beautiful… but also a bit intimidating” — you’re in the right place.
This bundle was created to help you learn the interlocking crochet stitch in the easiest, calmest way possible — without starting with a sweater, without worrying about fit, and without pressure.
Just small projects, clear guidance, and the confidence that comes from actually finishing what you start.
Final Thoughts
I hope you enjoyed this interlocking crochet tutorial. I have more free crochet tutorials that you might enjoy right here on the blog.
- Easy Crochet Color Change To Create A Sharp Edge
- How To Tell Right Side Of Crochet – 5 Easy Tricks
- FREE Interlocking Crochet Hat Pattern & Video Tutorial
- FREE Interlocking Crochet Basket Pattern & Video Tutorial
SHARE – If you think your crafty friends will like this, why not share the link with them? Alternatively, you can also share a direct link to this page on your social media so more people can crochet with us. Follow me on Facebook or Instagram and use #bluestarcrochet
PIN – do not forget to pin this page to your favorite Pinterest Board so you can easily find it later too.
JOIN – join like-minded crocheters working on my projects inside the Blue Star Crochet Facebook Community Group
SUBSCRIBE – It’s such an honour to share my crochet patterns with you and to be part of your creative journey. I’d love to stay connected and keep you inspired with new patterns, special discounts, and little surprises along the way. Sign up for my email newsletter & join a community of makers and enjoy a free gift as a thank-you for being here!

Veronika Cromwell | Blue Star Crochet
Veronika is a master in modern crochet design.
With a relentless focus on innovation and a vision that knows no bounds, she meticulously hones her crochet expertise she shares via crochet patterns, tutorials and online courses.
She helps the knowledge-thirsty crocheters bulldoze their way through hundreds of crochet techniques effortlessly and with ease like sharp scissors cutting thread.
Creating timeless fashion pieces without the “use-by-date” that stand the test of time in modern world is her lifelong mission.
Featured in Inside Crochet, Simply Crochet, Crochet Now and Happily Hooked and other awesome spaces on the internet, you too can join the crochet revolution!
Join her as she conquers the crochet world, one stitch at a time.


